


NDS Root Barrier Panels - 12" x 24" - EP-1250 - QTY: 50
NDS
$579.55
(No reviews yet)

Write a Review

NDS
NDS Root Barrier Panels - 12" x 24" - EP-1250 - QTY: 50
12" x 24" Root Barrier Panels by NDSProvides dependable tree root protection for sidewalks, patios and property lines.
|
 |
| Written Quotes: If you would like a written quote for your project please contact us. | |
|
Volume Pricing: We offer volume pricing on orders totaling over $5,000. Please call (800) 351-9633 or email support@rhizomebarrier.com for details.
|
|
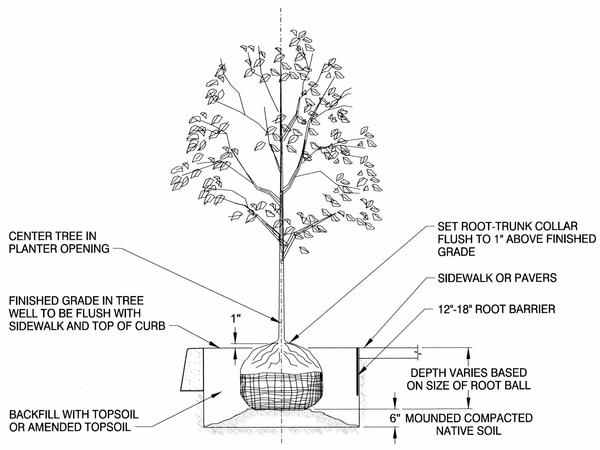
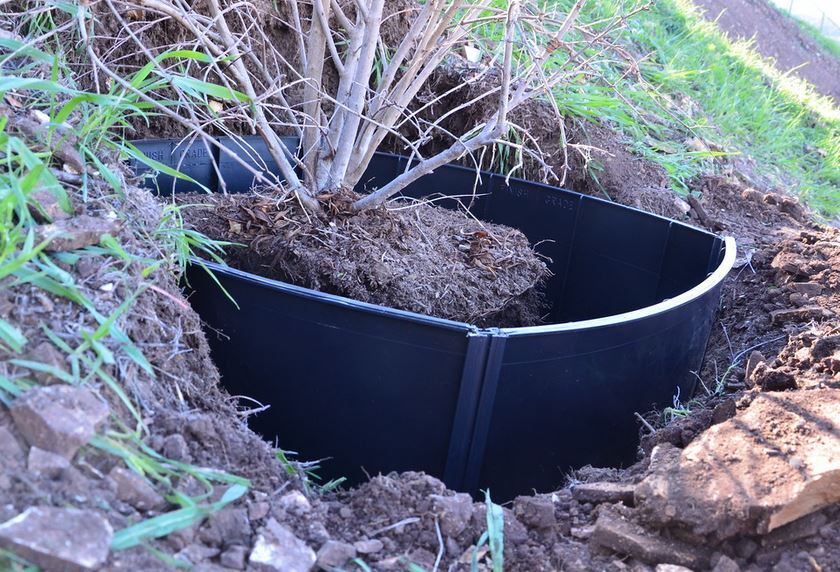
Surround Applications:EP Series Root Barriers can be installed in either a linear or surround configuration. The panels are flexible allowing for the installer to completely surround the tree root base.
|
 |
|
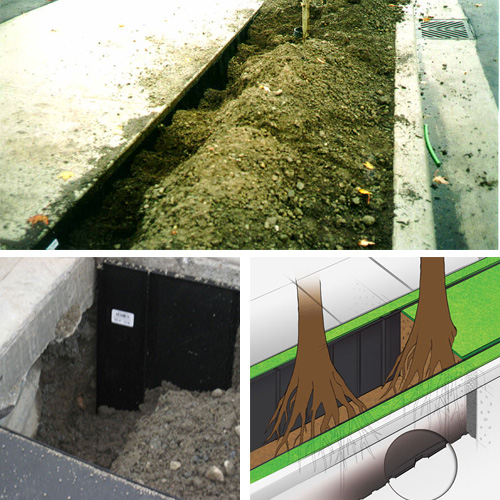
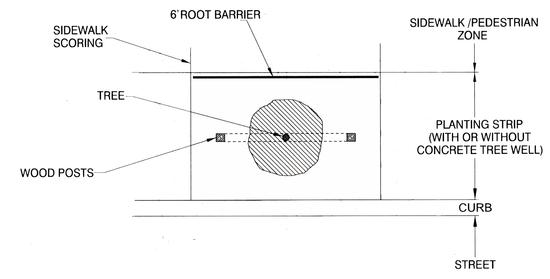
Linear Applications:In a linear application, the tree root barrier should be installed per the directions below: 2. Dig a trench along the sidewalk or patio centered on the planting site, 6 feet long and appropriately deep so the top of the root barrier will be 1/2" to 1" above the finished soil grade or flush with the level of the sidewalk or patio, whichever is lower. 3. Place the pre-assembled panels in the trench. Center the root barrier on the planting spot so it extends for 3 feet on either side of the tree trunk. Be sure that the ridges on the root barrier panels are facing the tree. Double check that the root barrier panels are 1/2" to 1" above the soil line. 4. Backfill while taking extra care to keep the root barrier in place. |
|
  |
|
Root Barrier: An Overview
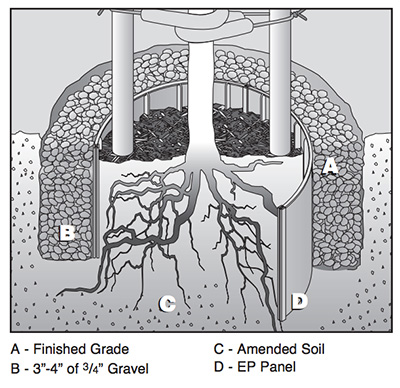
A root barrier is a modular panel system that redirects tree and shrub roots downward, protecting sidewalks, curbs, pavers, slabs, utilities, and planter edges. Using panels like the 12" x 24" EP-1250, you can create continuous root guidance with clean corners and fast installation.
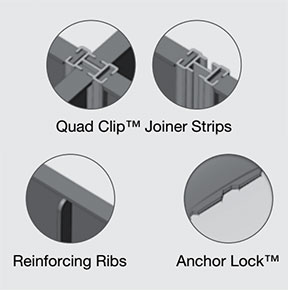
Technical overview: Interlocking panels form a vertical, non-degradable barrier with molded ribs that steer roots deeper into the soil profile. The roots still grow strong—but down and away from pavements and foundations, helping prevent heave, trip hazards, and costly repairs.
Panelized barrier shields paving and foundations
Where Root Barriers Make the Biggest Difference
- Sidewalks & pavers — minimize lift, settling, and trip hazards.
- Driveways & slabs — reduce cracking from shallow root pressure.
- Planter / turf edges — keep beds crisp and grass from invading beds.
- Utilities — deflect roots away from conduits, irrigation, and drain lines.
- Urban trees — guide roots downward where soil volume is limited.
Tip: Choose barrier height based on species vigor and space: 12" panels fit planter edges and light duty paths; deeper profiles are typical for large shade trees near pavements.
System Features (Quick Spec Checklist)
Panel size: 12" H x 24" L (EP-1250)
Material: durable, non-degradable polymer
Interlock: tongue-and-groove style connections
Ribs: vertical deflection ribs guide root direction
Corners: fast, secure panel-to-panel turns
Use: sidewalks, curbs, patios, beds, utilities
For long runs, stagger seams and anchor panels per manufacturer guidance. In high-traffic zones, consider deeper barriers or layered soil strategies to ensure long-term performance.

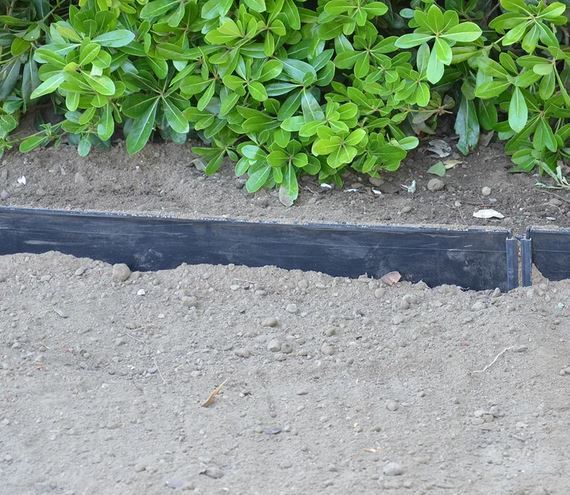
Clean corner connections for continuous protection
Set panels plumb in a narrow trench; backfill in lifts
Installation Highlights (Pro Tips)
- Plan the run: mark utilities; determine barrier height and linear footage.
- Excavate: open a narrow trench to required depth; keep sidewalls plumb.
- Assemble: interlock panels; add corners where layout turns; anchor as specified.
- Set & backfill: place panels with ribs toward roots; backfill in lifts and compact lightly to avoid voids.
- Finish grade: keep the top edge just below finish grade or as directed to maintain a clean, hidden line.
Performance depends on species vigor, soil conditions, and installation depth. Always follow manufacturer instructions and local guidelines.
Benefits You’ll Notice
Lower Repair Costs
Reduce slab lifts, cracked pavers, and curb heave before they start.
Safer Walkways
Fewer trip hazards mean better accessibility and fewer service calls.
Healthier Trees
Encourages deeper rooting and stable anchoring without girdling.
Case Study: Sidewalk Save on a Campus Walk
A campus walkway with recurring slab lift near mature ornamentals added a 12" panel root barrier along 120 linear feet. After one year, inspections showed no new displacement, reduced edging maintenance, and improved turf quality along the path.
Frequently Asked Questions
How deep should my root barrier be?Match the barrier height to species and risk: 12" for shrubs/ornamentals, deeper for aggressive tree species or critical hardscape protection.
Which way do the ribs face?
Face deflection ribs toward the roots so new growth is guided downward along the panel, not into it.
Will this hurt the tree?
Properly installed barriers redirect roots rather than cut them off. For large root pruning or mature trees, consult an arborist before trenching.


